What is Puff Pastry? A Beginner’s Overview
Puff pastry is like the unsung hero of the dessert world. Imagine layer upon layer of buttery, flaky goodness that melts in your mouth. That’s puff pastry in a nutshell! It’s a versatile dough made by folding butter into the dough repeatedly, creating hundreds of delicate layers. The magic happens when it bakes, as the butter releases steam, causing the layers to puff up beautifully. Whether you’re a beginner or a pro, puff pastry opens up endless possibilities for creating mouthwatering desserts.
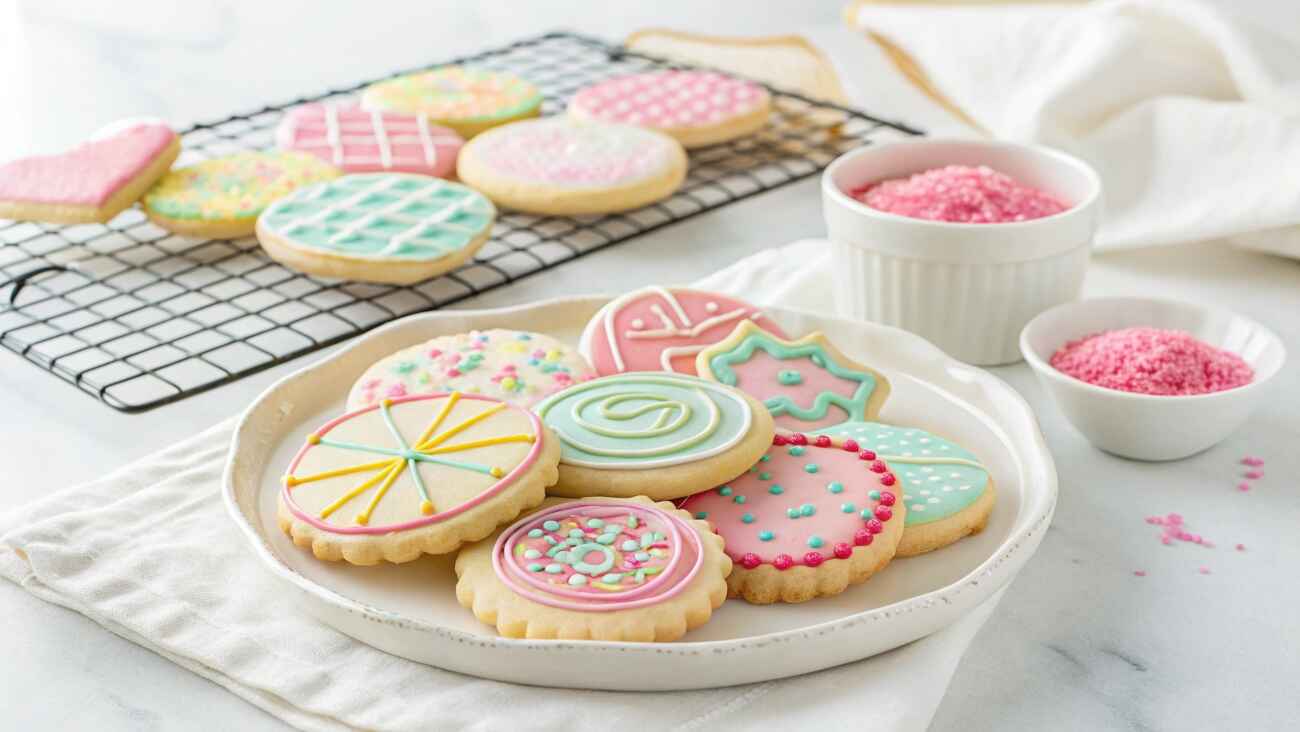
Looking for a detailed guide to baking perfect sugar cookies? 🍪 Check out our complete tutorial on How to Make the Best Rolled Sugar Cookies for Any Occasion. You’ll find tips, techniques, and decorating inspiration to make your cookies shine!
Table of Contents
Why Puff Pastry is Perfect for Desserts
Why is puff pastry a go-to for desserts? It’s all about the texture. The contrast between the crispy outer layers and the tender inner layers creates a perfect bite every time. Plus, puff pastry is a blank canvas for flavors. Whether you want something fruity, chocolatey, or even savory-sweet, puff pastry delivers. Another bonus? It’s quick to work with (especially if you use store-bought versions) and brings a professional touch to homemade creations.
Store-Bought vs. Homemade Puff Pastry: Pros and Cons
“Store-bought puff pastry is a time-saver, but homemade puff pastry? That’s a labor of love.”
When it comes to puff pastry, you have two choices: buy it or make it. Let’s weigh the options:
- Store-Bought: Perfect for beginners and busy bakers. It’s convenient and reliable but may lack the buttery richness of homemade versions.
- Homemade: While it’s time-consuming (hello, folding and chilling), the results are unmatched in flavor and texture. Plus, you get bragging rights!
So, which one should you choose? If you’re in a pinch, go for store-bought. But if you’re feeling adventurous, try making your own—it’s easier than you think!
Essential Tips for Working with Puff Pastry

Thawing and Handling Puff Pastry Correctly
Ever worked with puff pastry that’s too sticky or cracked? That’s a handling issue. To avoid this, always thaw puff pastry in the fridge overnight or for a couple of hours. Room-temperature thawing can make it too soft. When rolling it out, use a light dusting of flour and work quickly to keep it cool. Cold puff pastry is easier to shape, and it puffs better during baking.
Common Mistakes to Avoid When Using Puff Pastry
Even seasoned bakers can make mistakes with puff pastry. Here are some common pitfalls and how to dodge them:
- Over-handling: Too much touching warms the dough and flattens the layers. Use a light touch!
- Skipping the egg wash: This simple step gives your pastry a beautiful golden shine.
- Baking at the wrong temperature: Puff pastry needs high heat (375°F-400°F) to puff properly.
Tools and Ingredients Needed for Puff Pastry Desserts
You don’t need a fancy setup to create puff pastry masterpieces. Here’s your checklist:
| Tool | Why You Need It |
|---|---|
| Rolling pin | For shaping and rolling out the pastry |
| Pastry brush | To apply egg wash |
| Sharp knife or pizza cutter | For clean, precise cuts |
| Cooling rack | To prevent soggy bottoms |
As for ingredients, keep it simple: puff pastry, butter, eggs (for egg wash), and your choice of fillings (like fruits, chocolate, or cream).
Classic Puff Pastry Desserts Everyone Should Try
Apple Turnovers: A Timeless Favorite
Apple turnovers are the comfort food of puff pastry desserts. Imagine warm, spiced apple filling wrapped in golden, flaky pastry. They’re perfect for any season, especially fall.
Ingredients:
| Ingredient | Quantity |
|---|---|
| Puff pastry | 2 sheets |
| Apples (peeled and diced) | 2 cups |
| Brown sugar | 1/4 cup |
| Cinnamon | 1 tsp |
| Butter | 1 tbsp |
Directions:
- Preheat your oven to 400°F (200°C).
- Cook apples, sugar, cinnamon, and butter in a pan until softened.
- Roll out the puff pastry and cut into squares.
- Place the apple filling in the center, fold the pastry over, and seal the edges.
- Brush with egg wash and bake for 15-20 minutes until golden.
Cream-Filled Éclairs with Puff Pastry
You might think éclairs are just for pastry chefs, but puff pastry makes them a breeze. Fill them with whipped cream or custard for a decadent treat.
Palmiers (Elephant Ears): A Simple Yet Elegant Dessert
If you’re short on time, palmiers are your best friend. Made with just puff pastry and sugar, these crispy, caramelized pastries are stunning and delicious. Roll the pastry, sprinkle sugar, slice, and bake—done!
Creative Puff Pastry Dessert Ideas for Special Occasions

Puff Pastry Tarts with Fresh Berries and Cream
Hosting a party? Impress your guests with puff pastry tarts topped with fresh berries and whipped cream. They’re colorful, elegant, and easy to assemble.
Chocolate-Filled Puff Pastry Pockets
Who doesn’t love chocolate? These puff pastry pockets are filled with melted chocolate and baked to perfection. Add a sprinkle of powdered sugar for an extra touch.
Savory-Sweet Puff Pastry Twists for a Unique Treat
Combine sweet and savory flavors by twisting puff pastry with cinnamon sugar and a hint of cheese. It’s a surprising combination that will have everyone asking for more.
Easy Puff Pastry Recipes for Beginners
Quick Cinnamon Sugar Puff Pastry Sticks
Sometimes, simple is best. These cinnamon sugar sticks are crispy, sweet, and ridiculously easy to make. Perfect for a quick snack or a light dessert!
Ingredients:
| Ingredient | Quantity |
|---|---|
| Puff pastry | 1 sheet |
| Cinnamon | 1 tsp |
| Sugar | 1/4 cup |
| Egg | 1 (beaten, for egg wash) |
Directions:
- Preheat your oven to 375°F (190°C).
- Roll out the puff pastry and brush with the beaten egg.
- Mix cinnamon and sugar, then sprinkle generously over the pastry.
- Cut into thin strips and twist each one gently.
- Bake for 12-15 minutes until golden and crispy.
Nutella and Banana Puff Pastry Bites
For a rich and indulgent treat, Nutella and banana are a match made in heaven. Wrapped in flaky puff pastry, this dessert is hard to resist.
Ingredients:
| Ingredient | Quantity |
|---|---|
| Puff pastry | 1 sheet |
| Nutella | 1/4 cup |
| Banana | 1 (sliced) |
| Egg | 1 (beaten) |
Directions:
- Preheat your oven to 375°F (190°C).
- Roll out the puff pastry and cut it into small squares.
- Place a dollop of Nutella and a banana slice on each square.
- Fold the pastry over to form a pocket, sealing the edges with a fork.
- Brush with egg wash and bake for 15-18 minutes.
Cheese Danish: A Beginner-Friendly Delight
This classic pastry is surprisingly easy to make at home. With its creamy cheese filling and buttery layers, it’s a favorite for brunch or dessert.
Ingredients:
| Ingredient | Quantity |
|---|---|
| Puff pastry | 2 sheets |
| Cream cheese | 8 oz |
| Powdered sugar | 1/4 cup |
| Vanilla extract | 1 tsp |
| Egg | 1 (beaten) |
Directions:
- Preheat your oven to 375°F (190°C).
- Mix cream cheese, powdered sugar, and vanilla in a bowl until smooth.
- Roll out puff pastry and cut into rectangles.
- Spoon the cream cheese mixture onto each rectangle and fold the edges inward slightly.
- Brush with egg wash and bake for 20-25 minutes until golden.
Advanced Puff Pastry Recipes for Experienced Bakers
Mille-Feuille: The Classic French Pastry
Mille-feuille, or “thousand layers,” is a stunning pastry made with puff pastry and rich cream. While it requires precision, the results are worth the effort.
Ingredients:
| Ingredient | Quantity |
|---|---|
| Puff pastry | 2 sheets |
| Heavy cream | 1 cup |
| Powdered sugar | 1/4 cup |
| Vanilla extract | 1 tsp |
Directions:
- Preheat your oven to 400°F (200°C).
- Bake puff pastry sheets until golden and crispy, then cool completely.
- Whip heavy cream, powdered sugar, and vanilla until stiff peaks form.
- Layer puff pastry with cream, alternating layers, and finish with a dusting of powdered sugar.
Puff Pastry Rose Tarts with Apples and Cinnamon
These beautiful rose-shaped tarts are not only delicious but also a showstopper. Perfect for special occasions or as edible gifts.
Croissant-Based Desserts Using Puff Pastry Dough
If you love croissants, why not use puff pastry to create croissant-inspired desserts? Fill them with almond paste, chocolate, or jam for a quick upgrade.
Vegan and Gluten-Free Puff Pastry Dessert Options
Homemade Vegan Puff Pastry Recipes
Yes, vegan puff pastry is possible! Swap butter for plant-based margarine, and you’ve got a cruelty-free version ready to bake into delicious desserts.
Gluten-Free Substitutes for Traditional Puff Pastry
For those avoiding gluten, there are fantastic gluten-free puff pastry options available in stores or recipes you can try at home. Almond flour and tapioca starch are popular choices.
Creative Vegan Puff Pastry Desserts to Try
Why not try vegan fruit tarts or chocolate turnovers? The possibilities are endless, and they’re every bit as indulgent as their traditional counterparts.
Puff Pastry Dessert Pairings and Serving Suggestions
Best Beverages to Serve with Puff Pastry Desserts
Pairing puff pastry desserts with the right beverage elevates the experience. Imagine savoring a buttery croissant-like dessert with a hot drink or a sparkling wine. Here are some ideas:
- Coffee: A latte or cappuccino pairs beautifully with creamy puff pastry desserts like éclairs or cheese Danish.
- Tea: Herbal teas, like chamomile or mint, complement sweet and fruity pastries.
- Hot Chocolate: Perfect for chocolate-filled puff pastries, offering a decadent pairing.
- Champagne or Moscato: Add elegance with a bubbly pairing for fruit tarts or Mille-feuille.
These pairings bring out the flavors of the dessert, making your dining experience truly memorable.
Garnishes and Plating Ideas for Instagram-Worthy Desserts
The presentation can transform a simple puff pastry dessert into a showstopper. Want your creations to shine on Instagram? Here’s how:
- Dusting: A sprinkle of powdered sugar or cocoa powder adds a classic touch.
- Drizzles: Use melted chocolate, caramel, or fruit sauces for added flair.
- Fresh Fruit: Top with berries, sliced citrus, or candied fruits for a pop of color.
- Edible Flowers: Add a touch of sophistication with edible blooms.
Plating matters too! Serve your desserts on elegant plates, and use contrasting colors to make them stand out.
Storing and Reheating Puff Pastry Desserts Without Losing Texture
One of the trickiest parts of puff pastry is maintaining its texture after storage. Here’s how to keep it crispy and fresh:
- Storage: Place leftovers in an airtight container at room temperature for up to 2 days. For longer storage, refrigerate or freeze.
- Reheating: Use an oven or toaster oven to reheat at 350°F (175°C) for 5-10 minutes. Avoid microwaves, as they can make the pastry soggy.
By following these tips, your puff pastry desserts will stay delicious even after a day or two.
Troubleshooting Common Issues in Puff Pastry Desserts
Why is My Puff Pastry Soggy? Solutions to Fix the Problem
A soggy puff pastry can ruin your dessert. The culprit? Excess moisture. Here’s how to fix it:
- Precook fillings: Especially for fruits, precook to reduce their water content.
- Ventilation: Cut small slits in the pastry to let steam escape.
- Bake at the right temperature: High heat ensures a quick puff and less sogginess.
Preventing Undercooked Puff Pastry in Desserts
Nobody likes biting into a dessert only to find raw dough. To avoid this:
- Use a preheated oven to ensure even cooking.
- Avoid thick layers of pastry; roll it out if needed.
- Always bake puff pastry on the middle rack for even heat distribution.
Dealing with Puff Pastry That Doesn’t Puff Up Properly
If your puff pastry isn’t puffing, it could be due to:
- Warm pastry: Keep the pastry cold before baking.
- Incorrect rolling: Roll gently to avoid compressing layers.
- Oven temperature: Puff pastry needs high heat (375°F-400°F) to rise properly.
By troubleshooting these issues, you can achieve perfectly puffed desserts every time.
Frequently Asked Questions About Puff Pastry Dessert Recipes
Can I Refreeze Puff Pastry After Thawing?
Yes, but only if it hasn’t been left out for too long. Refreezing may slightly affect texture, so use quickly for best results.
How Long Can Puff Pastry Desserts Be Stored?
Most puff pastry desserts can be stored for up to 2 days at room temperature or up to a week in the fridge. Freezing extends the shelf life to a month.
What’s the Best Way to Roll Out Puff Pastry for Desserts?
Roll it out on a lightly floured surface, using even pressure. Avoid over-rolling to preserve the layers.
Can I Make Puff Pastry Ahead of Time?
Absolutely! You can prepare puff pastry dough ahead and freeze it for up to 3 months. Thaw in the fridge before use.
What Are Some Gluten-Free Puff Pastry Brands?
Look for brands like Schär or make your own using almond flour and gluten-free starches.
Is Puff Pastry Suitable for Vegans?
Many store-bought puff pastries are vegan, but check the label to ensure no butter or animal-derived ingredients are included.
Why Does My Puff Pastry Burn on the Bottom?
Burning often happens due to direct contact with a hot baking sheet. Use parchment paper or a silicone mat to prevent this.
Can I Use Puff Pastry for Savory Dishes?
Absolutely! Puff pastry is incredibly versatile and works well for savory pies, quiches, and appetizers.
What’s the Difference Between Puff Pastry and Phyllo Dough?
Puff pastry is buttery and layered, while phyllo dough is thinner and drier, requiring brushing with butter or oil between layers.
How Do I Keep Puff Pastry from Sticking?
Use a non-stick baking mat or parchment paper, and lightly flour your work surface to prevent sticking.
Conclusion: Unlocking the Magic of Puff Pastry Desserts
Why Puff Pastry Desserts Deserve a Place in Your Baking Repertoire
Puff pastry desserts are a blend of elegance and simplicity. Whether you’re hosting a party or indulging in a weekend treat, they never fail to impress. Their versatility allows you to experiment with countless flavors, making them a must-have in every baker’s repertoire.
Encouragement to Experiment with New Puff Pastry Creations
Don’t be afraid to get creative! Puff pastry is your canvas, so try new fillings, shapes, and presentations. Who knows—you might just create the next viral dessert sensation!
Print
How to Make the Best Rolled Sugar Cookies from Scratch
- Total Time: Approximately 1 hour 30 minutes
- Yield: Approximately 60 cookies, depending on the size of your cookie cutters 1x
- Diet: Vegetarian
Description
These classic rolled sugar cookies are tender, buttery, and hold their shape perfectly, making them ideal for cutting into festive shapes and decorating for any occasion.
Ingredients
- 2 cups (400g) granulated sugar
- 1½ cups (340g) unsalted butter, softened to room temperature
- 4 large eggs, at room temperature
- 1 teaspoon pure vanilla extract
- 5 cups (625g) all-purpose flour
- 2 teaspoons baking powder
- 1 teaspoon salt
Instructions
Prepare the Dough:
- In a large mixing bowl, cream together the granulated sugar and softened butter until the mixture is light and fluffy.
- Beat in the eggs one at a time, ensuring each is fully incorporated before adding the next. Stir in the vanilla extract.
- In a separate bowl, whisk together the all-purpose flour, baking powder, and salt. Gradually add this dry mixture to the wet ingredients, mixing until a smooth dough forms.
Chill the Dough:
- Divide the dough into two equal portions. Shape each portion into a flat disc, wrap them tightly in plastic wrap, and refrigerate for at least 1 hour. Chilling the dough helps in easier handling and ensures the cookies maintain their shape during baking.
Roll and Cut:
- Preheat your oven to 400°F (200°C). Line baking sheets with parchment paper.
- On a lightly floured surface, roll out one disc of dough to a thickness of about ¼ inch (6mm).
- Use cookie cutters of your choice to cut out shapes from the dough. Place the cut-out cookies onto the prepared baking sheets, spacing them about 1 inch apart.
Bake:
- Bake the cookies in the preheated oven for 6 to 8 minutes, or until the edges are just beginning to turn golden.
- Remove the cookies from the oven and allow them to cool on the baking sheets for a few minutes before transferring them to wire racks to cool completely.
Decorate:
- Once the cookies have cooled completely, you can decorate them as desired. Use royal icing, buttercream, or simple glazes, and add sprinkles or other decorative elements to enhance their appearance.
Notes
- Storage: Store the decorated or undecorated cookies in an airtight container at room temperature for up to one week.
- Freezing: The dough can be frozen for up to three months. Thaw in the refrigerator before rolling and baking. Baked cookies can also be frozen; ensure they are well-wrapped to prevent freezer burn.
- Flavor Variations: For a different flavor profile, consider adding a teaspoon of almond extract or a hint of lemon zest to the dough.
- Prep Time: 20 minutes (plus 1 hour chilling time)
- Cook Time: 6-8 minutes per batch
- Category: Dessert
- Method: Baking
- Cuisine: American
Nutrition
- Serving Size: 1 cookie
- Calories: 90
- Sugar: 6g
- Sodium: 50mg
- Fat: 4g
- Saturated Fat: 2.5g
- Unsaturated Fat: 1.5g
- Trans Fat: 0g
- Carbohydrates: 12g
- Fiber: 0g
- Protein: 1g
- Cholesterol: 20mg


